Showing posts with label Guest Post. Show all posts

Wednesday, August 10, 2011

recipe wednesday: peanut butter cup cupcakes with cognac ganache filling

Danielle is back with some amazing looking cupcakes this week!

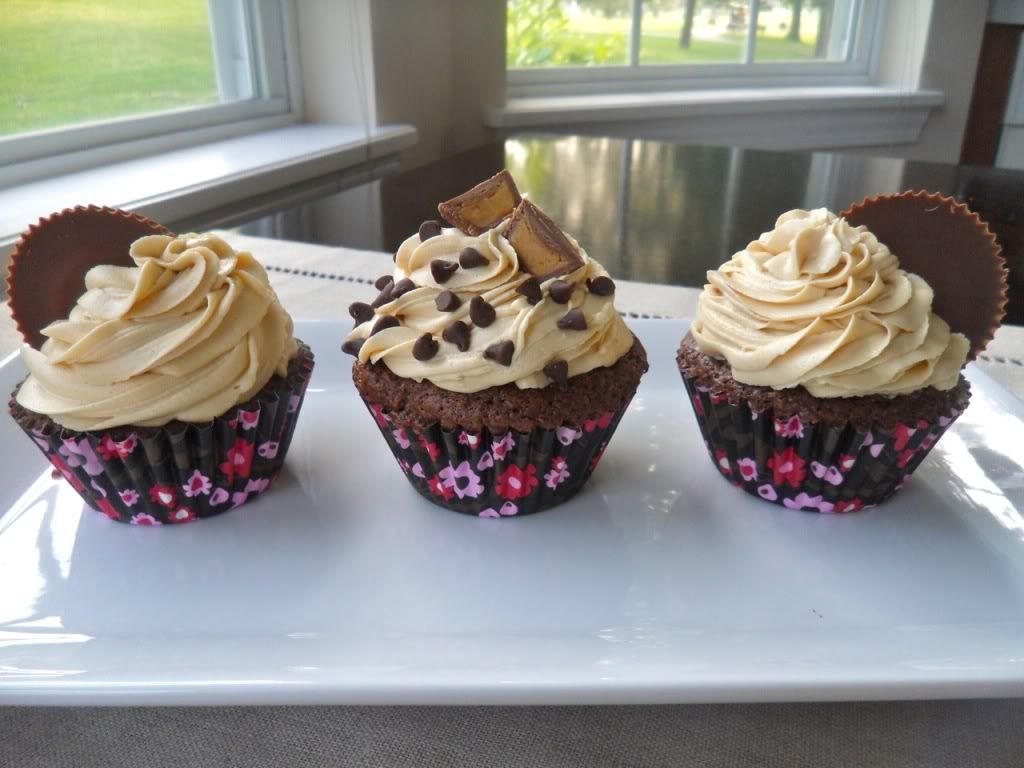
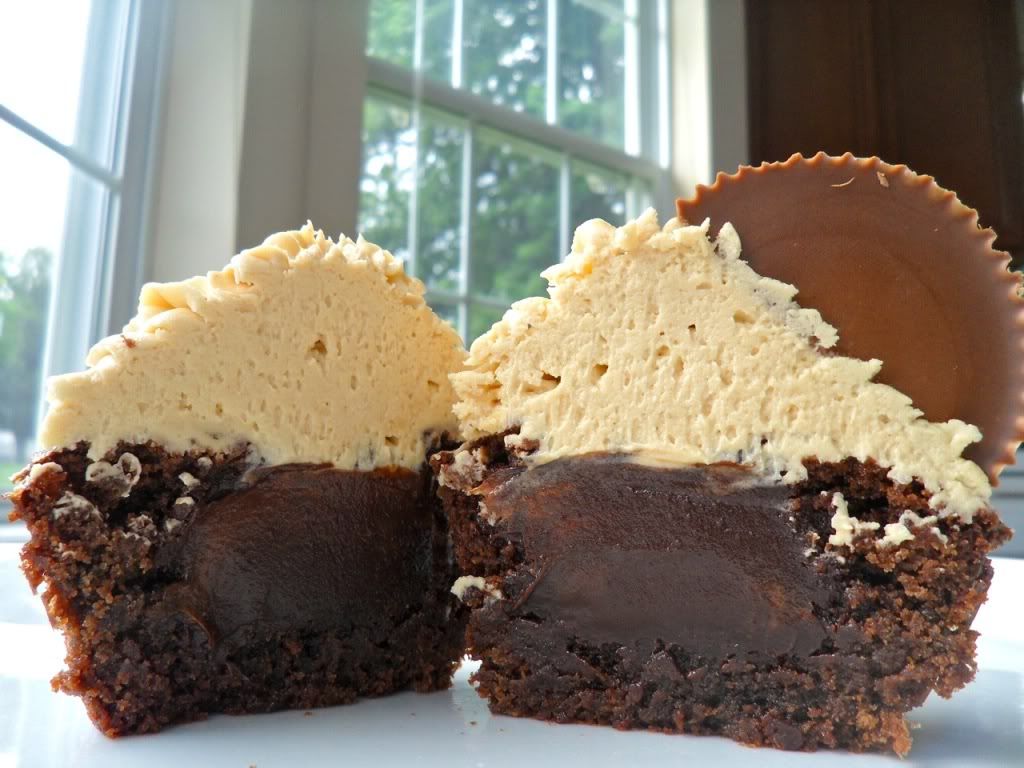
These cupcakes are a ridiculous indulgence and are every bit as heavenly as they look! A chocolate cupcake filled with a gooey chocolate and cognac ganache, topped with peanut butter buttercream icing and peanut butter cups... it doesn't get any better. There are two secrets to the chocolate cupcakes... one is that the batter is mixed by hand and not with a mixer, and the second is that it has melted baker's chocolate combined with the standard cocoa powder to make it extra yummy.


For the Cupcakes:
2/3 cups all purpose flour
2 1/2 tbsp unsweetened cocoa powder
3/4 tsp baking powder
1/4 tsp salt
3 oz. semi sweet Baker's chocolate, chopped
11 tbsp unsalted butter, cut into pieces
3/4 cup plus 2 tbsp sugar
3 eggs, at room temperature
1 tsp pure vanilla extract


For the Ganache:
4 oz semi sweet Baker's chocolate, chopped
1/3 cup heavy cream
1 tbsp unsalted butter, room temperature
2 tsp cognac (you can certainly leave this out if you don't want to include alcohol)


For the Icing:
1/3 cup solid vegetable shortening (crisco)
1/3 cup unsalted butter
3/4 cup creamy peanut butter
1 tsp pure vanilla extract
4 cups sifted confectioners sugar
4-6 tbsp milk

Assorted decorations: peanut butter cups, mini cups, chocolate chips, etc.

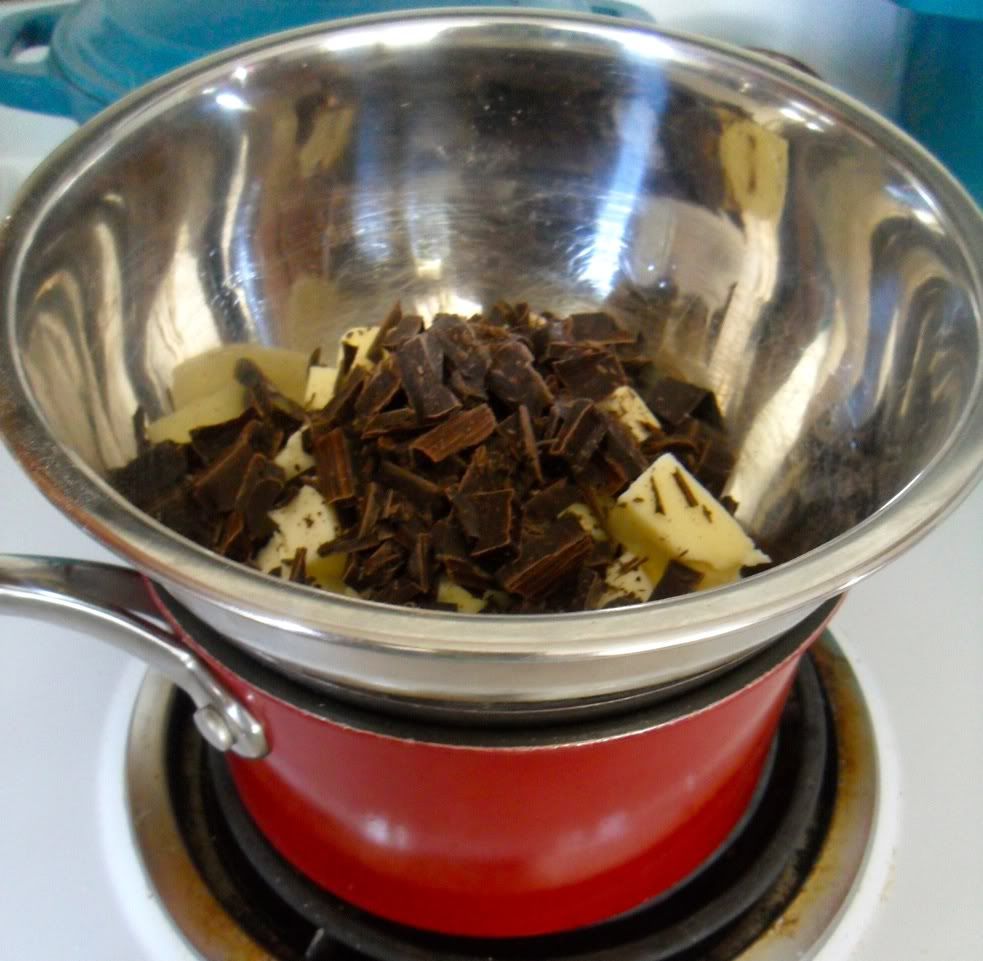
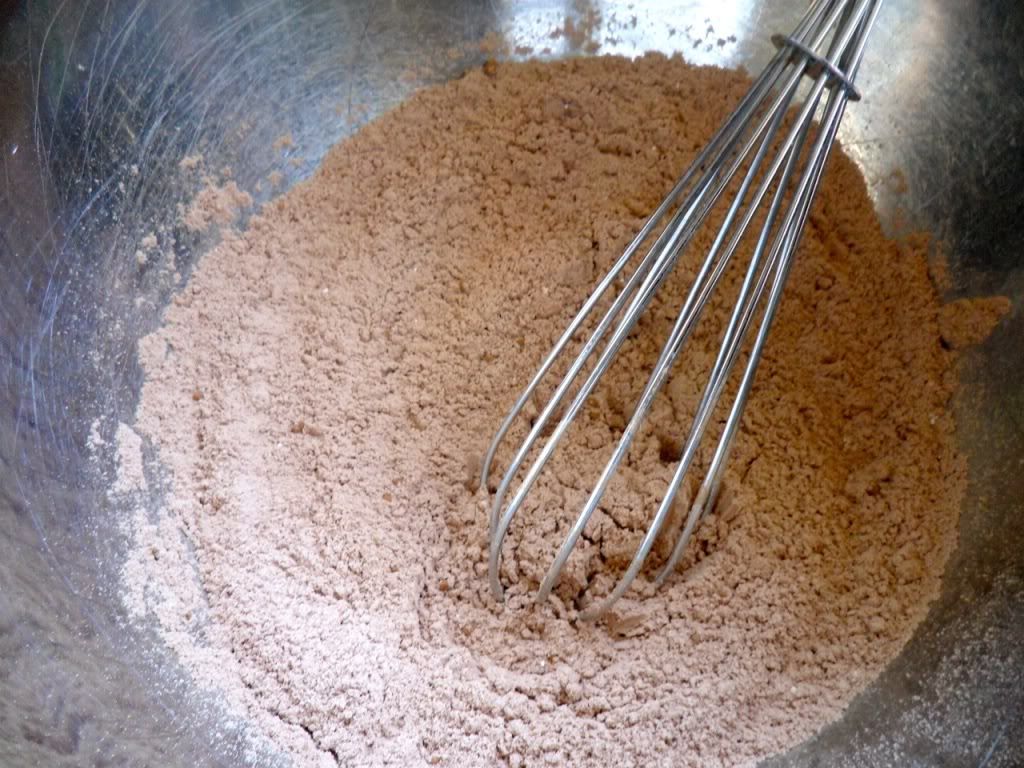
To bake the cupcakes, preheat oven to 350 degrees and line a standard muffin pan with 12 paper or foil liners. In a small bowl, whisk together the flour, cocoa, baking powder and salt. Place the chocolate and butter in a large heatproof bowl and set it over but not touching simmering water in a small saucepan. Stir frequently until completely melted and smooth, about 5 minutes. Remove the bowl from the saucepan and allow the mixture to cool to room temperature. Stir the sugar into the chocolate mixture using a spatula until combined. Stir in the eggs, one at a time, and beat after each addition until combined. Add in vanilla and gently fold in the flour mixture just until no traces of flour remain. It's very important you follow these steps exactly and DO NOT over mix or these cupcakes will turn out very dry and crumbly.
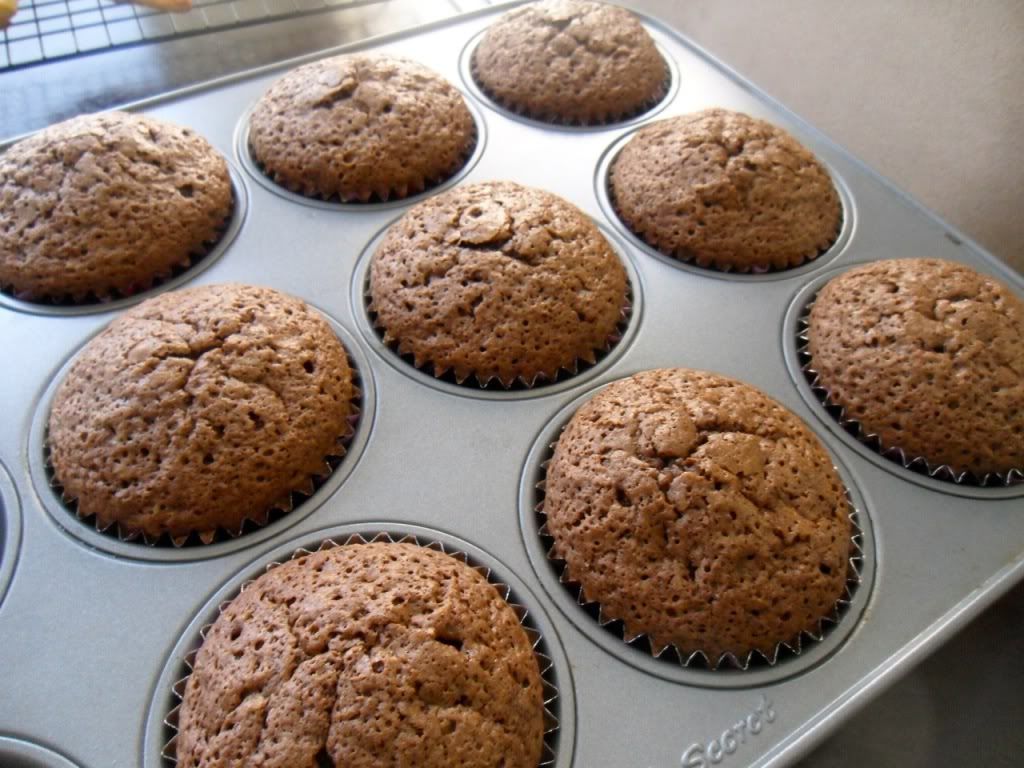
Divide batter evenly among the liners, filling about 3/4 the way full. Bake until a toothpick inserted in the middle comes out with only a few moist crumbs attached, about 22-24 minutes. Cool in pan on rack for 5 minutes then take cupcakes out and let cool completely for an hour.
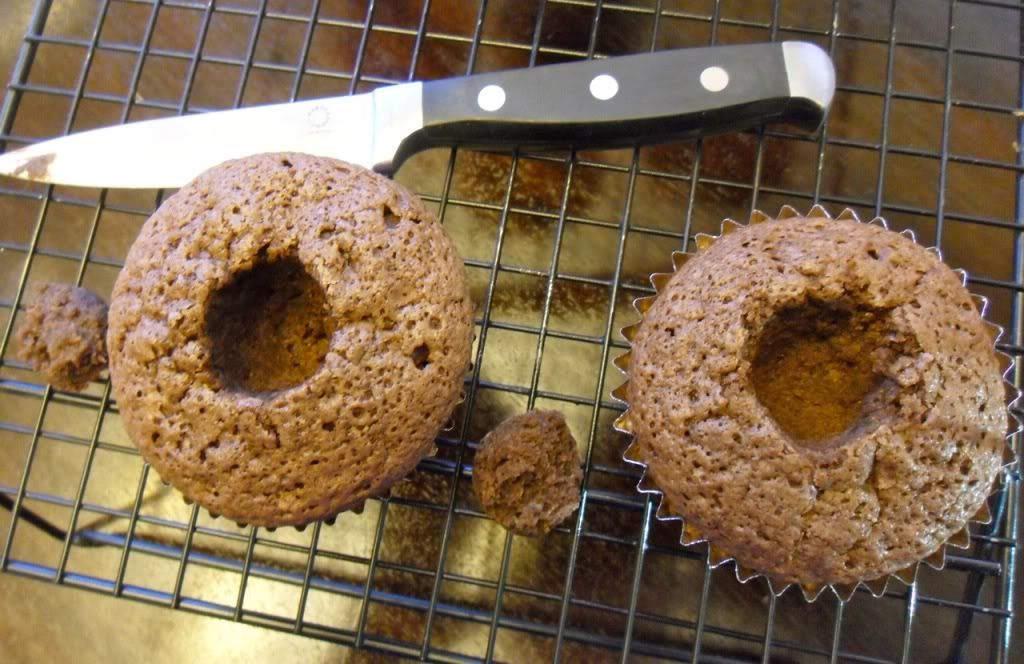
Using a paring knife, cut a small round hole in the middle of the cupcake, and pull out the "cylinder" of cupcake. Trim that cylinder to about a half inch... this will be used to "cork" the cupcakes back up once we fill them. Use your finger to press down lightly inside the hole in the cupcake to make a cavity to fill with the ganache.
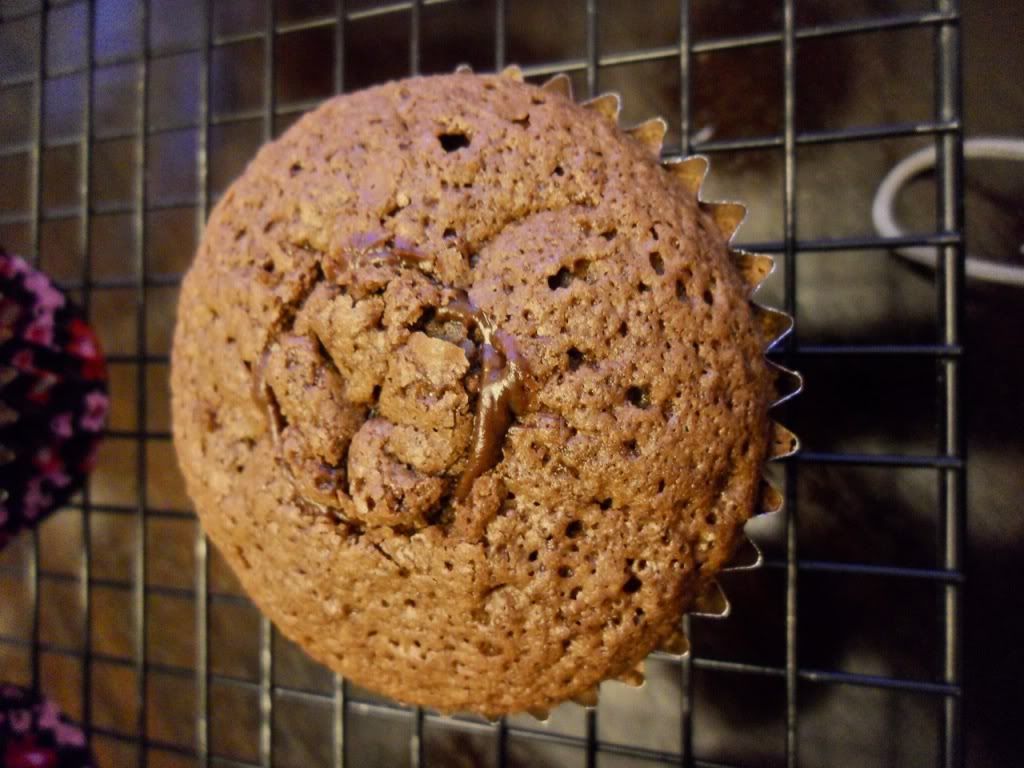
To make the ganache filling, place the chocolate in a small heatproof bowl and set aside. Heat the cream in a small saucepan until simmering (don't let it boil). Pour over the chocolate, let it sit for about a minute and then stir until smooth. Add in the vanilla and cognac (is using) and stir until smooth. Wait a few minutes for the ganache to start to cool and set up before filling the cupcakes. Spoon the ganache into the cupcakes and then top with the cupcake "corks".

Make the frosting by creaming the shortening and butter in an electric mixer . Add peanut butter and vanilla. Gradually add the confectioner's sugar, one cup at a time at low speed. When all the sugar is incorporated, the icing will appear very dry. Add the milk, one tablespoon at a time until the frosting reaches the right consistency and is light and fluffy. Everyone ices cupcakes differently... but I use a piping bag and a 2C wilton tip. I usually alternate decorating half the cupcakes with regular sized peanut butter cups that have been cut in half (freeze them before cutting them to get clean cuts), and the other half are decorated with mini cups and mini chocolate chips. 
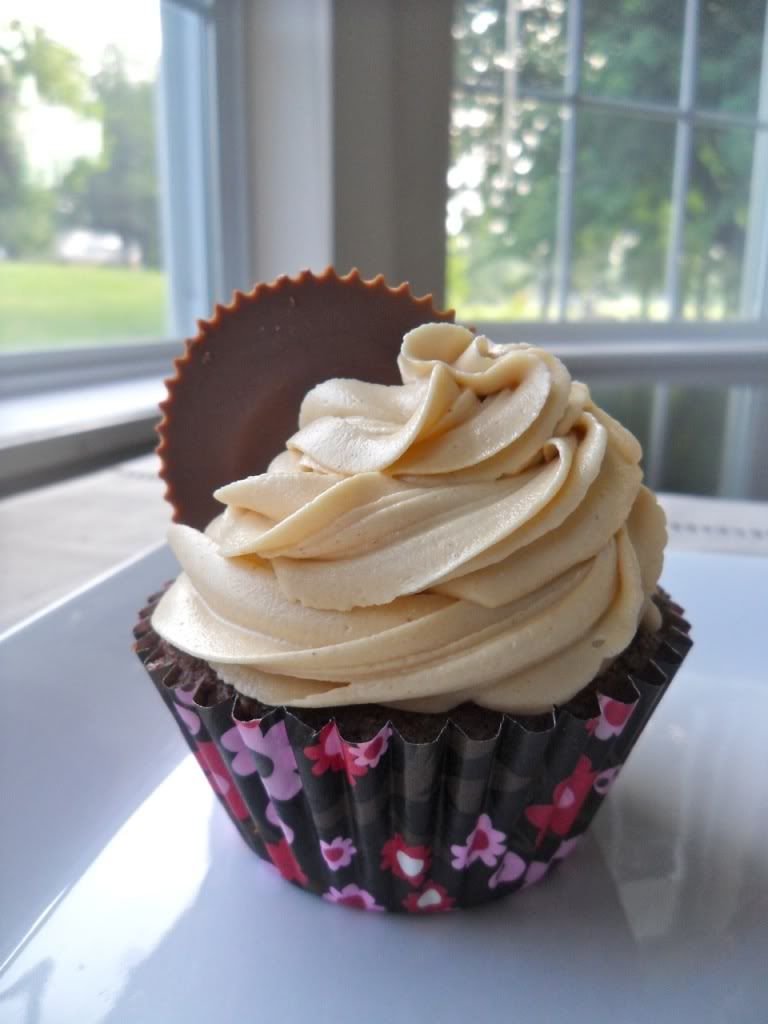


Once cupcakes are finished, store them in an airtight container in the refrigerator to allow the ganache filling to set up fully. Let come up to room temperature for about a half hour before eating. The ganache inside will be gooey but not runny.
Friday, August 5, 2011

recipe wednesday (on a friday): buffalo chicken wing dip

 Anne brings ya another delicious dip this week.
This recipe comes from my sis-in-law Angela!  Who made it this weekend for a family party.  Angela is a great host always having people over for poker night or a bonfire.  Trust me she knows how to throw a party! 


Buffalo Chicken Wing Dip


‎2 large cans of Chicken - flaked
1 pkg Cream Cheese - softened
1 cup of Frank's Hot Sauce
Mixed with 1/2 stick of butter in microwave
1 bottle of Rudy's Bleu Cheese
1 package of Sharp Shredded Cheddar


Mix all ingredients together
Top off with more shredded cheese
Bake until bubbly at 350 degrees


Serve with tortilla chips or celery.

how to thursday(on a friday)

Be sure to check out the giveaway over at A Wild Tonic, where you can win two art prints from Gillian:) And you know you better check out the sister giveaway going on right here.


How to succeed at making cookies without a cookie cutter

You ever had this problem? You make some cookie dough, you roll it out on the counter with your trusty rolling pin, and go to reach for the cookie cutter from your drawer of baking stuff and....it's lost/gone/disappeared/maybe you just never had one?


DSCF3079


So what to do? Clearly all this delicious cookie dough can't go to waste, and probably definitely I shouldn't eat it all raw.

My solution: Use a wine glass or a drinking glass instead--It's round and makes a great cookie cutter, with the added bonus that you can fill it up with some wine after you're done making cookies!


DSCF3079


DSCF3074


Look how perfectly round these cookies turned out:


DSCF3076


And they looked (and tasted) even better once they were baked!


DSCF3080_edit


♥ Craftzilla


DSCF2218

Gillian from Craftzilla Conquers the world

I'm Gillian, a 20-something crafter from Canada, and lover of all things  crafty, reused and beautiful! I live in Ontario with my boyfriend and  cute cocker spaniel-poodle mix pup Jesse. Craftzilla Conquers the world is a blog where I share fun tutorials,  thrifted finds, recipes, snippets and photos from my life (I won't lie,  there may be a lot of cute dog photos) as well as sneak peeks from my  brand new Etsy shop, Craftzilla Conquers. 


Wednesday, August 3, 2011

Recipe Wednesday: Croissants

 Danielle brings you some amazing looking croissants this week.

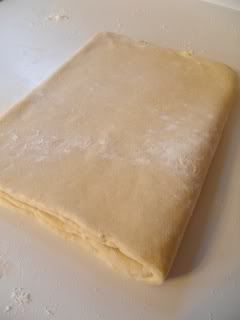
I think like a lot of people, the only croissants I'd ever had was the kind that came in a tube and took 10 minutes to make. This takes a LOT longer than that to make but you will find out quickly that those croissants out of a tube can't hold a candle to the real thing! The process of adding the butter and folding and rolling out the dough several times creates 24 layers that when baked make buttery, golden brown, flaky perfection. They're amazing on their own, served with homemade jam or butter, or even cut in half and used to make chicken salad sandwiches. 


For the dough:
3 tablespoons unsalted butter
Scant 1/4 cup loosely packed fresh yeast
generous 1/2 cup cold water
3 1/3 cups bread flour
2 teaspoons salt
1/3 cup granulated sugar
generous 1/2 cup whole milk
1 cup plus 2 tablespoons unsalted butter (room temperature)


For the Egg Wash:
2 large egg yolks
1 large egg
Scant 1/4 cup whole milk


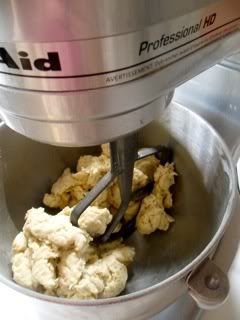
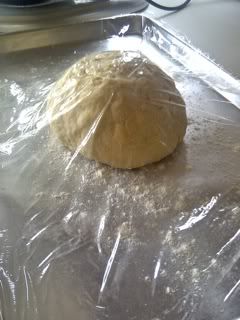
Melt the 3 tablespoons butter in a small saucepan over low heat. Allow the butter to cool to room temperature. In a small bowl, dissolve the yeast in the cold water. Place the flour, salt, sugar, milk, and melted butter in the bowl of a stand mixer fitted with the paddle attachment. Set the mixer on medium speed and mix just until the ingredients are dispersed, about 5 seconds. Add the dissolved yeast and beat on medium-high speed until the dough is well combined and no longer sticks to the sides of the bowl, about 1 minute. If the dough is too soft (it can’t hold it’s shape), add more flour 1 tablespoon at a time until it is firmer. If the dough is too hard (it’s difficult to mix in the mixer), add cold water 1 tablespoon at a time until it has softened. Remove the dough from the mixing bowl. Knead the dough with your hands for about a minute, until it is smooth. Pat it into a ball. Place the dough on a lightly floured baking sheet, cover with plastic wrap, and let it proof at room temperature for about 30 minutes. 


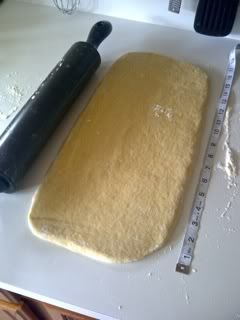
Place the dough on a lightly floured work surface and roll it out to an 8 by 15-inch rectangle about 1/4-inch thick. Wrap the rectangle in plastic wrap and refrigerate for 2 hours. 


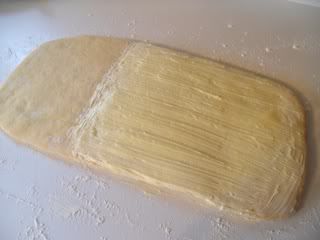
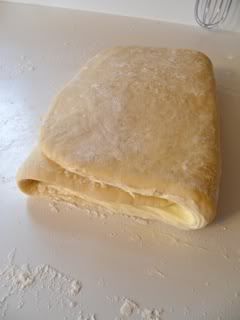
Remove the dough from the refrigerator, unwrap the rectangle, and place it with a long side facing you on a lightly floured work surface. Spread the softened butter evenly over the right two thirds of the dough. Incorporate the butter by folding the (butterless) left third of the dough over the center, Then fold the right third of the dough to the left, to resemble a folded letter. 


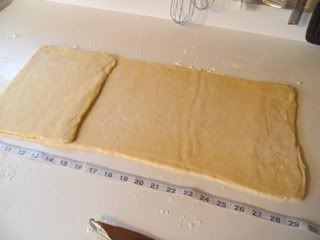
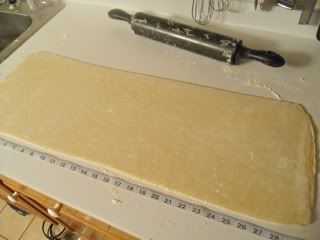
Roll this out into another 10 by 30-inch rectangle about 1/8-inch thick. Fold each short end of the dough to the middle so they meet but do not overlap. Then fold one half over the other half. Wrap the folded dough in plastic wrap and let it rest in the refrigerator for a minimum of 2 hours.


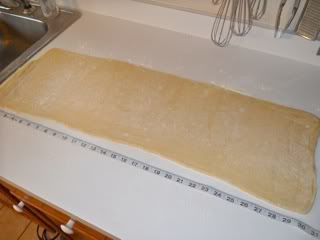
Remove the dough from the refrigerator, unwrap it, and place on a lightly floured work surface. Roll it into a 10 by 30-inch rectangle and turn it so a long side faces you. Give the dough a single fold by folding the left third of the dough over the center, then fold the right third of the dough to the left. Now the dough should resemble a folded letter. Wrap in plastic wrap and let it rest in the refrigerator for 30 minutes.


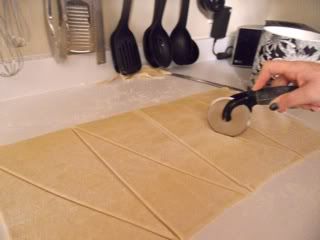
Remove the dough from the refrigerator and place it on a lightly floured work surface.  Roll out the dough into a 10 by 36-inch rectangle about 1/4-inch thick. Use a sharp chef's knife or a pizza cutter to cut out rectangles that are 5” by 10”. Cut the rectangles in half diagonally to make triangles. 


Lay each triangle on a lightly floured work surface with the tip facing you. Gently pull the tip toward you; this light stretch adds layers to the finished croissant without adding density. Use the palms of your hands to roll each triangle up from the base to the tip. (At this stage, they can be frozen for up to 1 week if well wrapped in plastic wrap. Thaw on a parchment paper-covered baking sheet overnight in the refrigerator before proceeding.)


Place the rolled croissants on a parchment covered baking sheet; spaced about 2 inches apart. Loosely cover the baking sheet with plastic wrap. Allow the croissants to proof at room temperature until they have doubled in size and appear light and full of air; about 1 1/2 to 3 hours depending on the temperature of the room and of the dough.


Preheat the oven to 375 degrees F. Make an egg wash by whisking together the egg yolks, whole egg, and milk in a small bowl until well combined. With a pastry brush, very gently coat the pastries completely with egg wash. Bake until golden brown, about 10 minutes.


Wednesday, July 20, 2011

Recipe Wednesday: Goat Cheese, Walnut and Cranberry Canapes

 Last week, Danielle garnered praise for her delicious Brie En Croute. This week, something just as delectable.


GOAT CHEESE, WALNUT AND CRANBERRY CANAPES


This recipe is great because it's easily split in half or even doubled in order to accommodate the number of people it needs to serve. It's nice and light, which makes it perfect for a summer appetizer. The tartness of the cranberries and the lemony taste of the thyme go perfectly with the creamy goat cheese, and the walnuts add a perfect crunch.

Serves 8 (makes 24 pieces)

* 3/4 cup walnuts
* 4 tsp of olive oil (divided)
* 1/4 tsp ground cinnamon
* salt & pepper for seasoning
* 1 french baguette
* 8 ounces goat cheese, softened
* 2 tbsp water
* 1/2 cup dried cranberries
* 1 tsp chopped fresh thyme, plus more for garnish

Preheat oven to 375 ˚ F.

Toss the walnuts with 1 teaspoon olive oil and the cinnamon, season with salt and pepper. Scatter onto rimmed baking sheet and bake until golden brown, about 4-6 minutes. Set aside to cool.

Cut the baguette into 24 thin slices. The easiest way I've come up with to do this is to cut the entire baguette in half, then cut each half in half again... making 4 even quarters. Since you need 24 slices total, you know you need 6 slices from each quarter. This way you know you're going to get the right number of slices and that they'll all be relatively the same size. Spread the baguettes onto your baking sheet and brush with the remaining olive oil, season with salt and pepper. Bake until lightly toasted, 10 to 15 minutes. Set aside to cool.

Meanwhile, in a medium sized bowl, stir together the goat cheese and water until smooth. Stir in the dried cranberries and chopped thyme. Spread the goat cheese topping evenly on the toasted baguette slices and top each with the toasted walnuts and a sprinkle of thyme leaves.

Thursday, July 14, 2011

How To Thursdays: Re-Potting a Plant

 Today's How To comes from Gillian. Check out her info at the bottom of the page, of course after you've finished reading her sweet post.


How to: Re-pot a Plant

This is Edgar. Edgar has outgrown his pot.

DSCF2726

Here are some tips on how to repot your plant friends when they outgrow their pots.

To start with, wait a few days after the last time you watered the plant to repot it --it's easier to re-pot a plant when the dirt is fairly dry.

Choose a new pot that is  just a few inches than the old one, because plants should only be repotted to a bigger sized pot gradually. I got this fancy one at Value Village --I think Edgar will enjoy his new home, don't you?

DSCF2728

Pick the right kind of soil for your plant. Edgar is just a regular kind of plant, so I just used a bag of regular potting soil. Plants like geraniums and any kind of cactus (including things like aloe plants) will need a special type of soil.

DSCF2729

Add dirt to the new pot, filling it about 1/3 of the way full.

DSCF2737

Loosen the dirt in the old pot around the plant gradually-- I used a trowel to help.

DSCF2734

Lift the plant out of the old pot --if the roots/dirt at the bottom are really packed and in the shape of the pot, use your fingers to loosen the dirt and loosen some of the roots.

DSCF2738

Put the plant in the new pot.

FIll up the new pot with dirt, packing the dirt down loosely around the plant.

Give your friend a drink after all this hard work!

DSCF2741

Edgar says thanks for his new home!

DSCF2742

♥ Craftzilla

About the Author:

DSCF2218

Gillian from Craftzilla Conquers the world
I'm Gillian, a 20-something crafter from Canada, and lover of all things crafty, reused and beautiful! I live in Ontario with my boyfriend and cute cocker spaniel-poodle mix pup Jesse. Craftzilla Conquers the world is a blog where I share fun tutorials, thrifted finds, recipes, snippets and photos from my life (I won't lie, there may be a lot of cute dog photos) as well as sneak peeks from my brand new Etsy shop, Craftzilla Conquers.

Wednesday, July 13, 2011

Recipe Wednesday: Bangin' Bean Salsa

Welcome to the second guest post of the day! This was written by Anne, also known as Pickles to her college roommates(I'm one of them). She loves getting all Martha when it comes to appetizers and makes some wicked Monster Cookies, too!

Bangin' Bean Salsa

Photobucket

This salsa is so good you will be eating it with a spoon out of the bowl!


Mix in a large bowl:

1 can Shoe Peg Corn (drained)
1 can Black-eyed Peas (drained and rinsed)
1 can Black Beans (drained and rinsed)
1/4 cup Chopped Red Onion
1 cup Chopped Celery
1/4 cup Jalapenos chopped


In a pan heat the following:

1/4 cup Balsamic vinegar
1/2 cup Sugar
1/2 cup Olive Oil


Bring to boil while stirring (sugar dissolves into the oil), then turn off burner letting it cool.  Once cool pour over mixture.  Refrigerate before serving.

Photobucket

Recipe Wednesday: Brie En Croute

This is the first of two guest posts today for Recipe Wednesday. It was written by an old friend of mine, the lovely Danielle, who wows me pretty much on a daily basis with her creations via Facebook photos. 


BRIE EN CROUTE

Photobucket

Don't be intimidated by the fancy name, it literally just means cheese in a crust! What I love about it is that it's super simple yet it looks impressive and most importantly, you can make it ahead of time! It's perfect if you need to bring something to a get together, or if you're hosting a dinner party because you can put it all together earlier in the day then just throw it in the oven just before serving it.

* 1 sheet frozen puff pastry
* 2 tbsp unsalted butter (divided)
* 1/2 cup walnuts
* 1/4 tsp ground cinnamon
* 1 (8 ounce) wheel of brie
* 1/4 cup light brown sugar
* kitchen twine (optional)
* crackers, for serving


Defrost your puff pastry for about a half hour before you begin.

Preheat your oven to 375˚ F.

Unfold the puff pastry and lay it on a flat surface, then put the brie round in the center. Melt 1 tbsp of the butter in a small saucepan over medium heat. Add the walnuts and saute until they turn a golden brown, about 5 minutes. Add in the cinnamon and stir until the nuts are coated well. Put the walnut mixture right on top of the brie and then sprinkle  the brown sugar on top of that. Start pulling the puff pastry up over the whole thing, until all the cheese and filling are encased. 

Photobucket

Photobucket

You can tie the whole thing up with kitchen twine (just like a present) to keep anything from leaking out, though if you wrap it tight enough you don't have to. Melt the other tbsp of butter and brush it over the entire thing. This will help create a golden brown crust when you bake it. If you don't have butter, you can also use a beaten egg... I've even used milk, they all work just fine. I made this for my anniversary so I used extra puff pastry and cut out heart shapes which I put on top for decoration. You can make it without anything extra on top or you can get creative and try some different things.

Photobucket

Bake in the oven for 20 minutes until the pastry is golden brown. Serve with crackers.

Photobucket


Tuesday, May 31, 2011

Worrying About My Spring Break Style

Guest post written by Hayley Roten

Every time that I go to the beach, my naturally curly hair just goes nuts. I love the beach and it makes me so sad though that I normally just wear my hair in a ponytail or bun all the time. I'll start out wearing it down but then it will just get so big that I give up on it and pull it back at the last minute. Well, I'm going to the beach for spring break this year and I'm going to plan ahead for some cute hairstyles that will translate well into photos.
I was online about a week or so ago trying to find some good hairstyle ideas and when I was doing that I found the site get.wildblue.com. I read through it some and after that I decided to sign up for one of the internet packages that I found on the site.

I think that the cutest spring break hairstyle that I've found is a variation of a low side ponytail that looks really cute.