Wednesday, August 31, 2011

recipe wednesday: Beignets Framboise

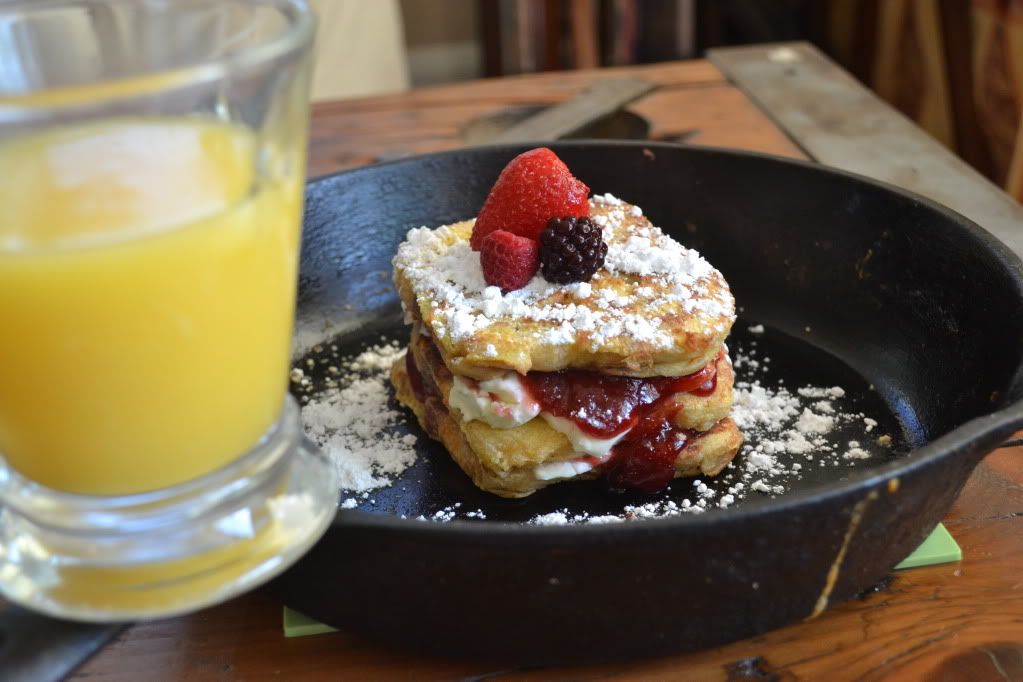
 Today, Danielle shows you how to make a sweet treat!

Beignets Framboise
Don't be intimidated by the name, it's just the French version of raspberry jam doughnuts.  These puffy yeast pastry doughnuts are fried, filled with a flavorful homemade jam and and then rolled in cinnamon and sugar... and are every bit as delicious as they look. Another plus about this recipe is that you'll be shocked at how easy it is to make your own jam, which will allow you to play around with whatever fruit is your favorite.


Jam Filling:
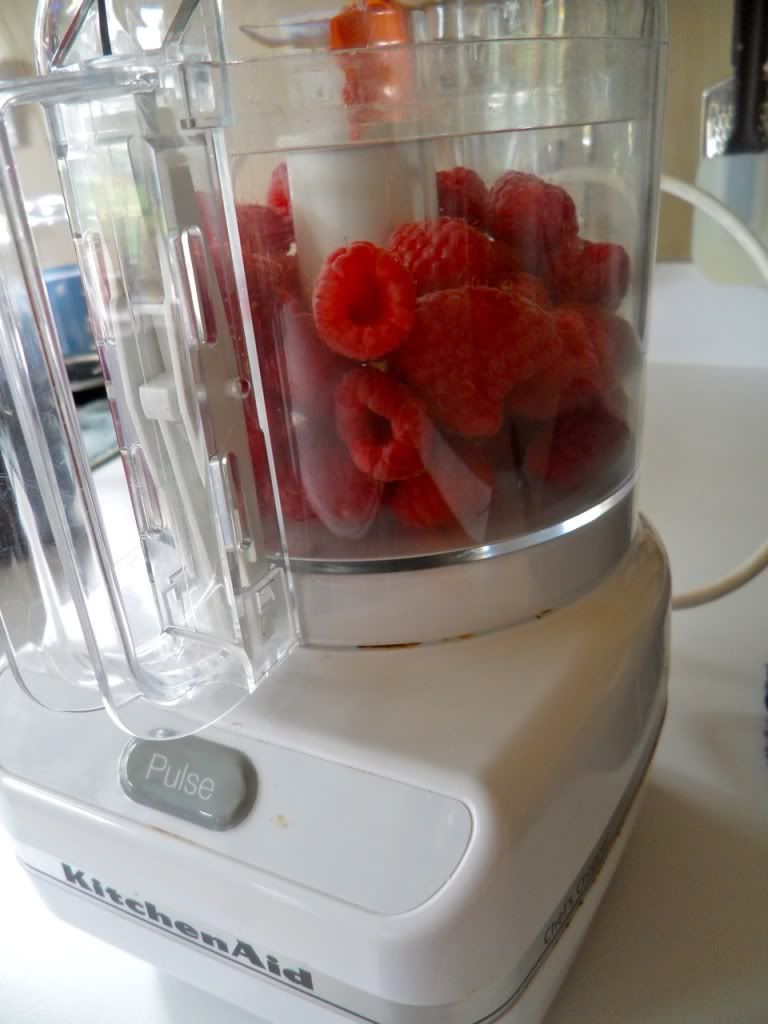
1 1/2 c fresh raspberries
1/2 cup + 1 tbsp granulated sugar
4 tsp pectin powder
1/2 lemon
Leavener for Beignet Dough:
2 cups +2 tbsp cake flour
1/6 oz active dry yeast
3/4 cup + 1 tsp water


Beignet Dough:
1 3/4 cup + 3 1/2 tbsp cake flour
1/3 cup granulated sugar
2 oz active dry yeast
2 tsp salt
5 egg yolks
3 1/3 tbsp whole milk
4 1/2 tbsp softened unsalted butter


Vegetable Oil for frying


Cinnamon Sugar Topping:
1/4 cup granulated sugar
1 tbsp cinnamon

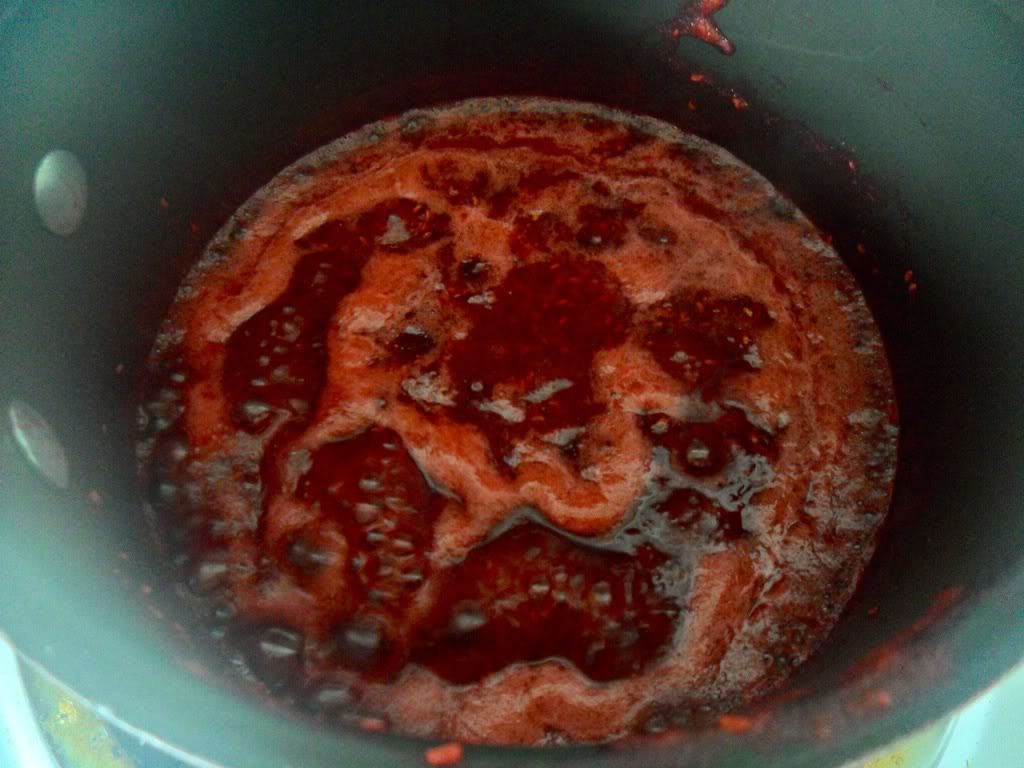
First make the jam filling. Puree the raspberries in the bowl of a food processor then heat to lukewarm in a small saucepan. Take off heat and add pectin, sugar and the juice from the 1/2 lemon. Put back on medium heat and bring to boil. Boil for 2 minutes, pour into bowl, cover in plastic and let cool completely. Refrigerate once cooled.


Next, make the leavener for the beignet batter. Dilute the yeast in the water and mix in a medium bowl with the cake flour. Allow to double in volume at room temperature for 1 hour.


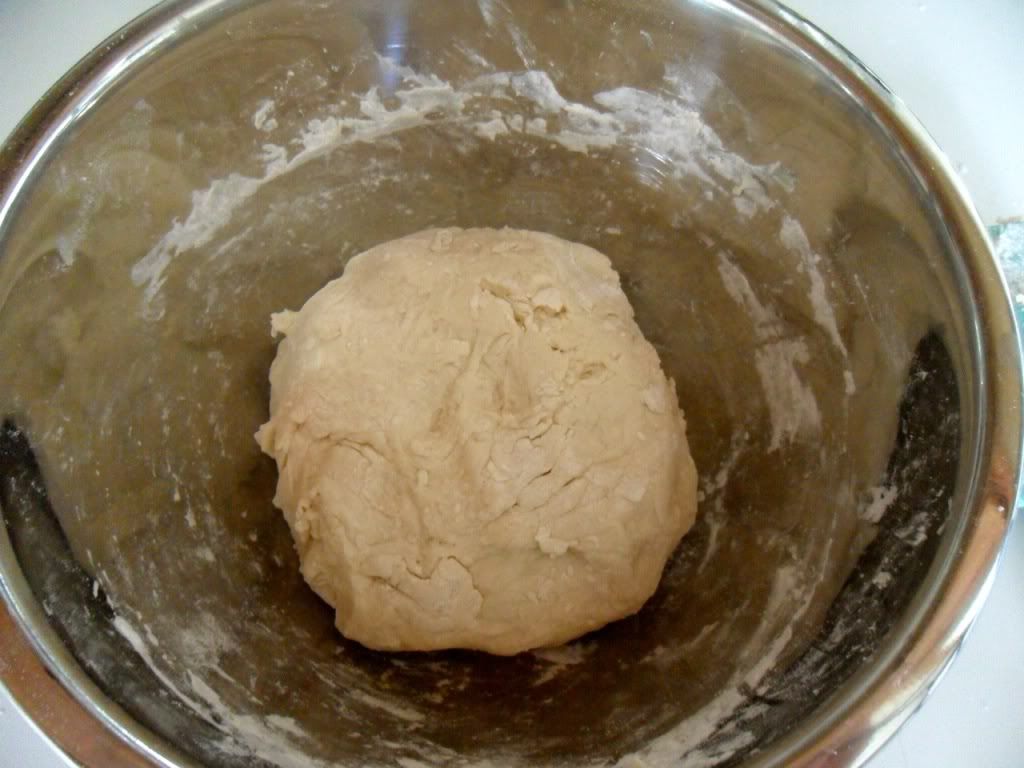
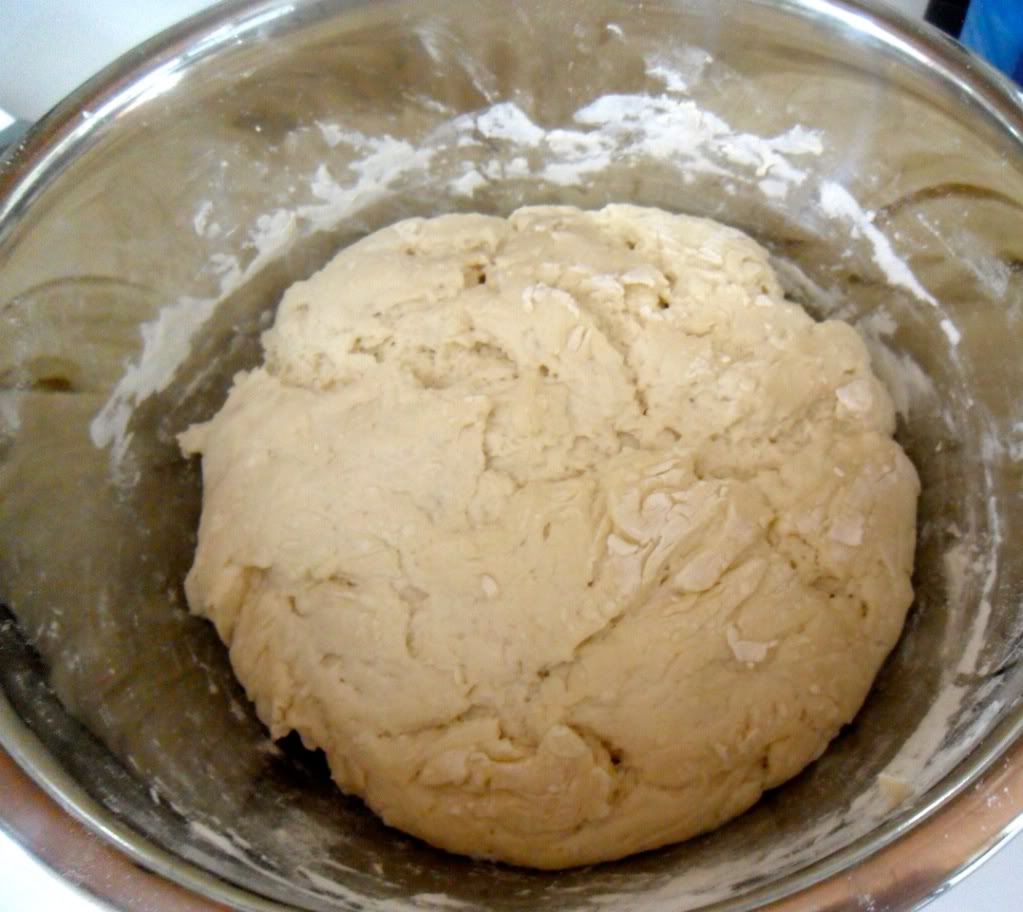
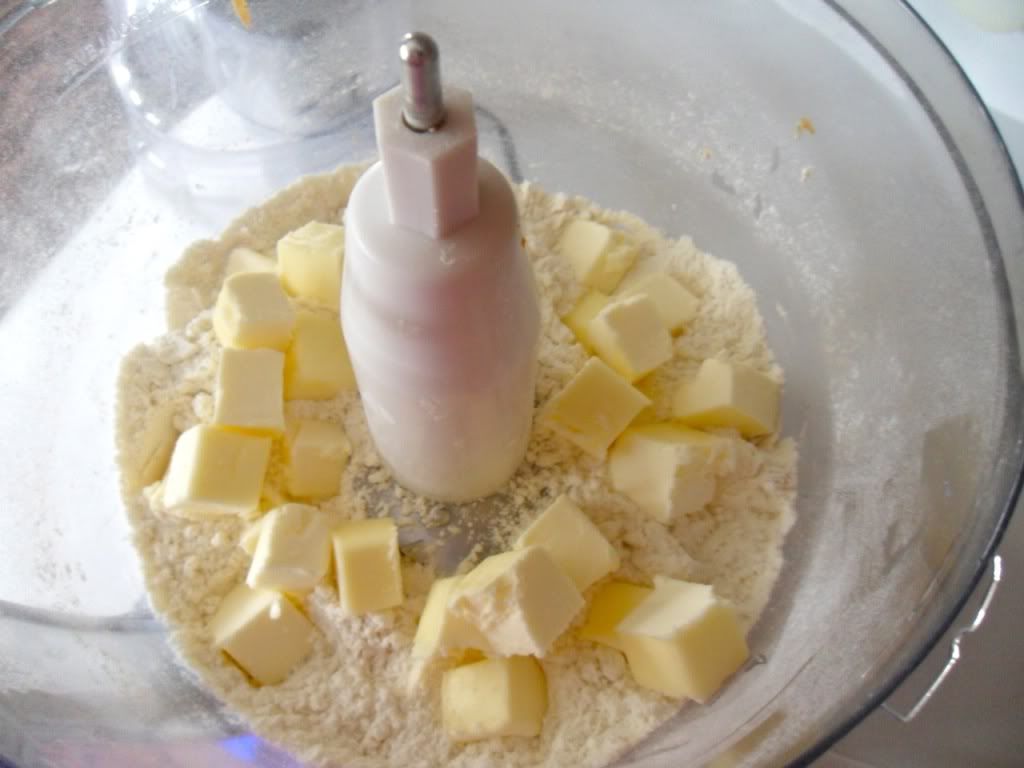
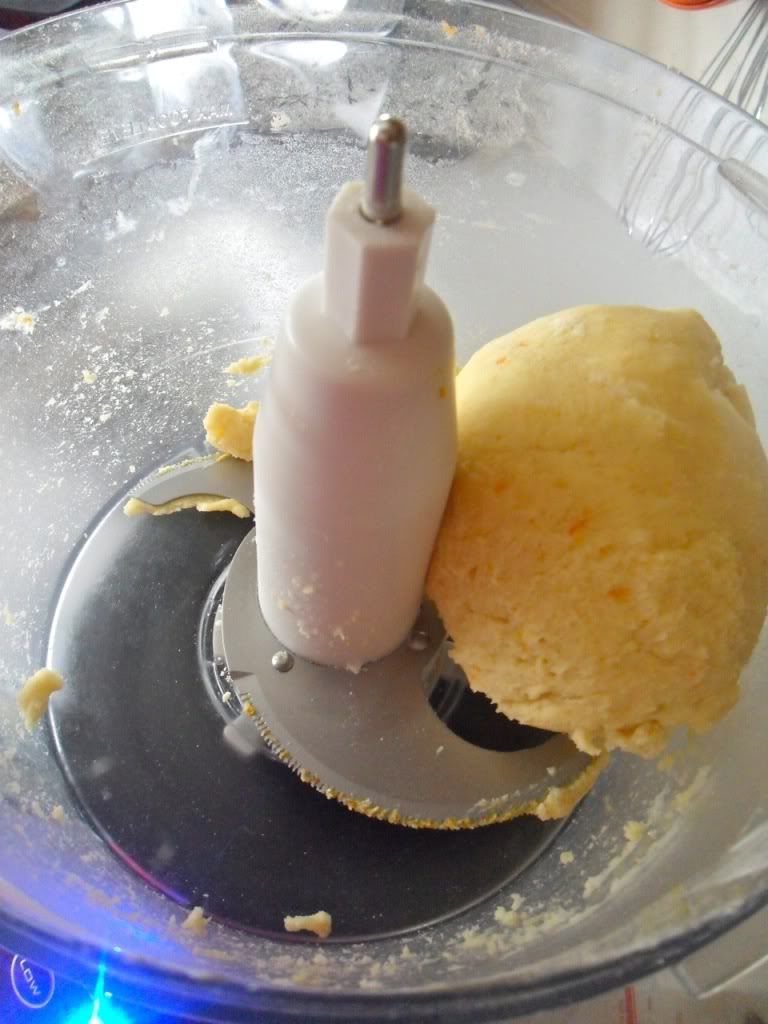
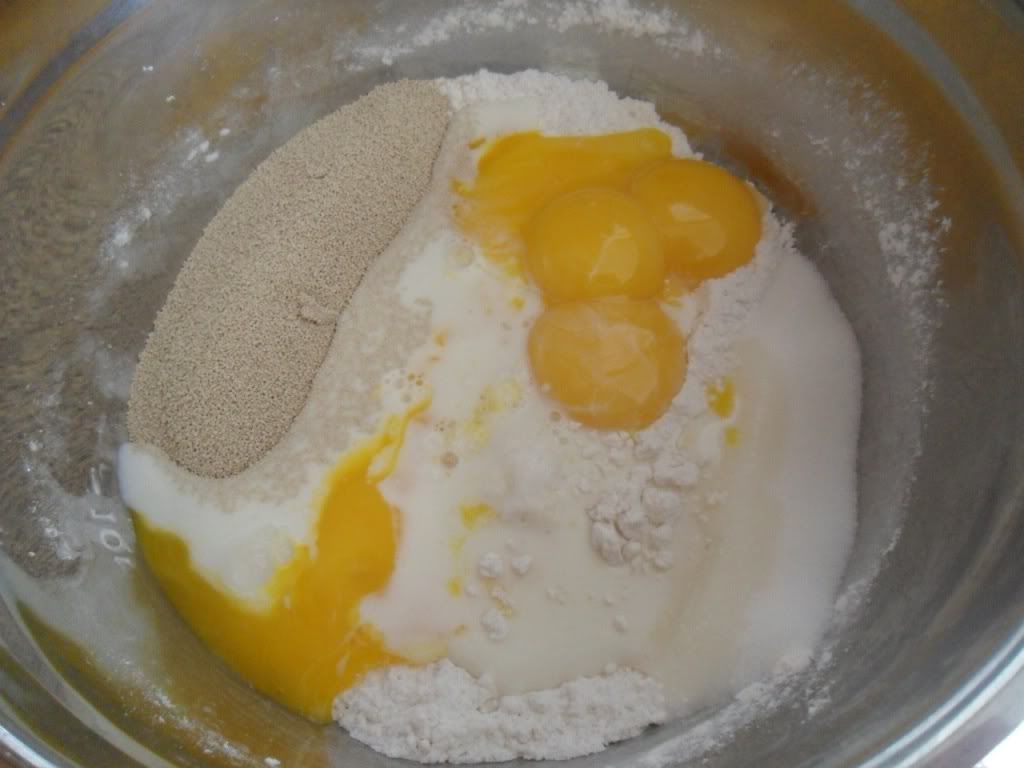
To make the beignet dough, place the cake flour and sugar in a large bowl. Add the yeast and salt, but keep both on opposite sides of the bowl and do not allow the two to touch until your ready to mix. Add the egg yolks and whole milk and mix everything together until just combined. Add in the softened butter and the leavener and mix together until dough starts to form. Dump the dough onto counter and knead with your hands until smooth, form a ball with the dough and place back in bowl. Allow this to double in volume for 1 hour at room temperature. Punch in the middle to deflate the ball of dough then refrigerate for 30 minutes.
 

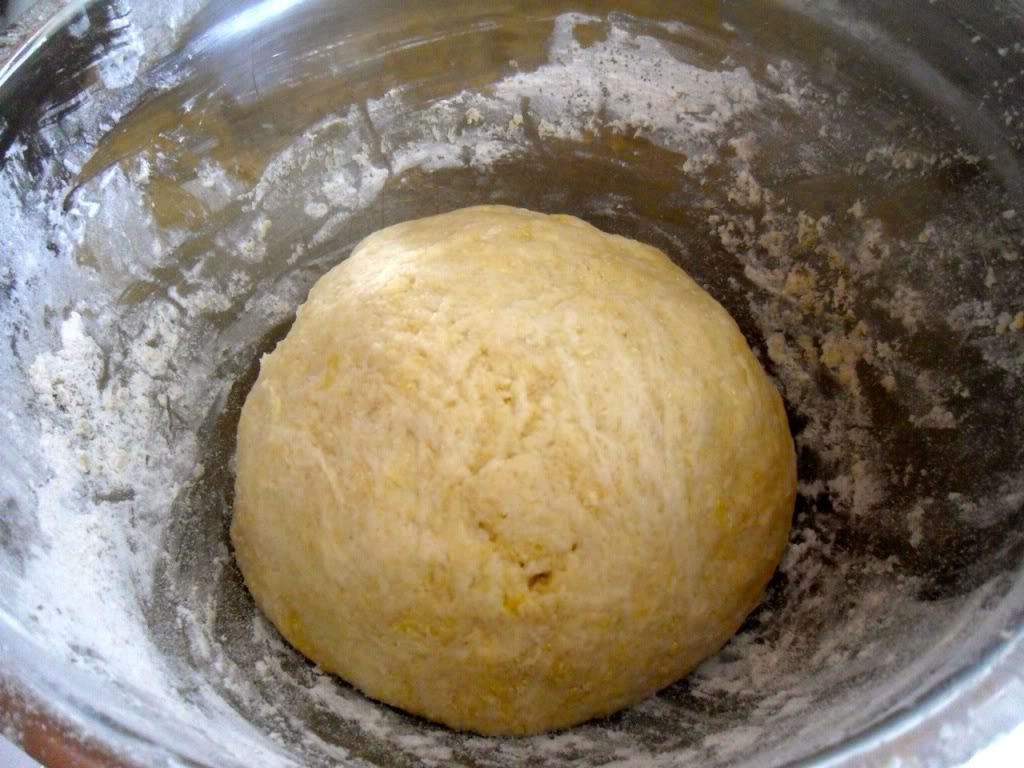
Weigh out 2 oz  pieces of the dough and form into balls. Place doughnuts on a floured dish towel and allow to proof at room temperature for 1 and 1/2 hours.


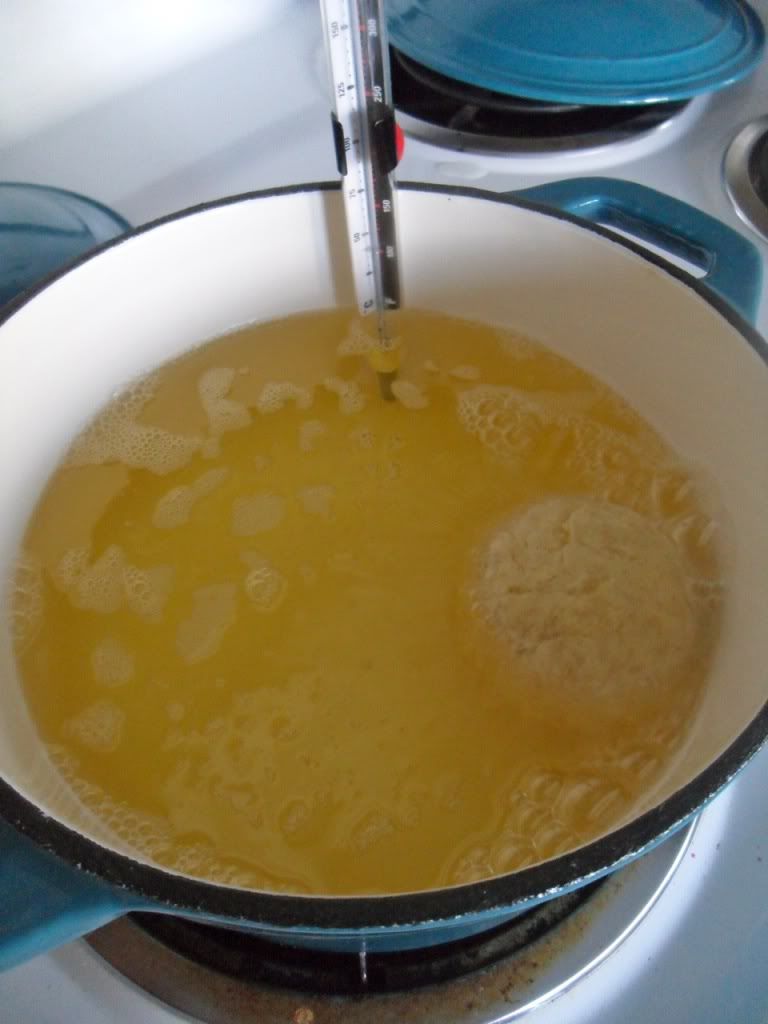
Preheat vegetable oil in a heavy duty pot to 325-340 degrees. I usually put my burner on medium heat and let the oil take its time to come up to temperature. It takes longer (about 20 minutes) but it ensures that the oil will stay at the right temperature throughout the frying process. Fry the doughnuts, a few at a time for about 3-4 minutes until they just start to brown (they will continue to brown once you remove them from the oil so it's important to take them out right away) Drain on paper towels.


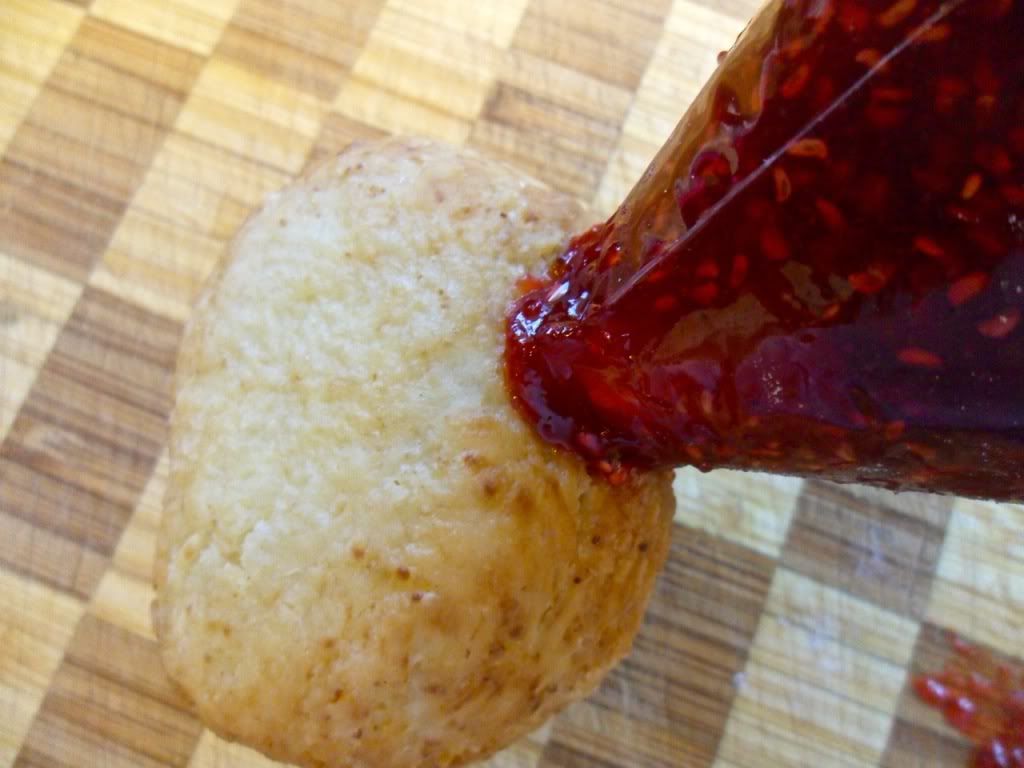
Once cooled, put the jam in a piping bag and fill the doughnuts. Roll in the cinnamon and sugar and enjoy!


Monday, August 29, 2011

uk readers: check out kandco.com

Have you ever checked out K&Co? You can find their site at kandco.com. It is pretty sweet and has me wishing I were living in England, so I could purchase the great deals!

I love the fact that is truly a one stop shop, where you can buy yourself a new outfit, while also buying something for your boyfriend's birthday, a housewarming gift for your best friend, and a new TV for the den. All in one shopping site. Amazingly convenient.


I scoped out their dresses and thought I would share my favorite two, so check them out below:


Aren't they gorgeous? In love to the max! But what are dresses without some rocking sandals? K&Co also has a great selection of footwear to go with your outfits. I love wedge sandals, because they offer more support than a plain heel and they give me some height, because I am quite short. I have picked out two pair you can purchase from K&Co, so check them out:


 How about the second pair? Amazing!

So, if you are in the UK, be sure to check out K&Co, for all of your shopping needs.

*This post is in association K&Co.

Friday, August 26, 2011

cute, little people in cute, little dresses

I had my nieces rocking some vintage dresses while I was watching them yesterday. They looked like adorable 1950s children, so of course we had to have a quick photo shoot. Ari was ALL about her blue dress and red hat, while Cali was NOT having her red, sailor dress(after some early smiles). It was hilarious, but in the end she got to try on the blue dress, as well. Crisis averted (after some tears).

And pictures:


My goal: get them into vintage at a young age...even if one ends up in tears.

Thursday, August 25, 2011

recipe wednesday(on a thursday): cranberry meringue mini pies

 Danielle is back with some amazing pies.


One thing you should know about me is that I LOVE fall. I love the weather, the fact that it means football is finally here, the produce that's in season... in fact you'd be hard pressed to find something that I don't love about fall. Once August hits I start getting antsy, hence this recipe. In order to make these pies in the summer I had to make a couple changes, obviously cranberries and blood oranges aren't in season so I had to use frozen cranberries and a navel orange instead. The crust for these is a french pastry called Pâte Sucrée which is perfect for pies because it holds up really well to the filling. The juice from the orange sweetens the tartness of the cranberries in the filling and the fluffiness of the meringue topping creates the perfect combination.


Cranberry Meringue Mini Pies


For the Citrus Pâte Sucrée:
1 1/4 cup all-purpose flour
2 tbsp granulated sugar
1/8 tsp salt
1 stick cold unsalted butter, cut into pieces
1 large egg yolk, lightly beaten
1-2 tbsp cold heavy cream

For the Filling:
12 ounces (3 1/4 cups) fresh cranberries
1 1/2 cup granulated sugar
1 3/4 cup water
1 1/2 tsp grated lemon zest
1 tsp grated blood orange zest and 1/4 cup blood orange juice
1/4 tsp salt
1/8 tsp ground cinnamon
pinch of ground cloves
3 tbsp cornstarch

For the Meringue:
3 large egg whites
pinch of cream of tartar


Make the Pâte Sucrée by pulsing the flour, sugar, salt and both zests in a food processor until combined. Add the butter pieces and pulse just until the mixture resembles coarse meal. Add the yolk and drizzle 1 tbsp of the cream over the mixture, then pulse until dough comes together... no more than 30 seconds. If the dough is too dry, add the remaining tbsp of cream. Pat the dough into a disk and wrap in plastic, refrigerate for an hour.


On a lightly floured surface, roll out dough to 1/8 inch thick. cut out twelve 4-inch fluted rounds and fit into cups of a standard 12-cup muffin tin (not nonstick). Dock the bottom of the "pies" using a fork and then freeze until firm, about 30 minutes. Preheat the oven to 375 degrees.


Line the shells with parchment (just cut out parchment rounds the same size as the shells) and fill with pie weights or dried beans. Bake for 15 minutes, remove weights and parchments. Bake until bottoms are just turning golden, 5 minutes more. Transfer to wire racks, let cool 5 minutes then remove shells from tin and let cool completely.


While the shells are cooling, make the filling. Bring 2 cups of the cranberries, 1 cup of sugar and 1 1/2 cups water to a boil in a medium saucepan. Reduce heat, and simmer mixture, stirring occasionally until the cranberries burst, about 5 minutes. Pour through a sieve and discard solids. You should have about 1 3/4 cups juice... if you have less, add water.


Bring the strained cranberry juice, 1/4 cup sugar, the zests, salt, cinnamon, cloves and remaining 1 1/4 cup cranberries to boil in medium saucepan, stirring occasionally. Reduce heat and simmer until cranberries are soft but not have not burst, about 3 minutes.


Meanwhile, combine cornstarch, orange juice, and remaining 1/4 cup water in a bowl. Whisk into cranberry mixture in the saucepan. Bring to a boil, stirring constantly and cook for about 1 minute until thick. Divide mixture among shells and let set in the refrigerator, 1 hour or up to one day.


Make the meringue by whisking the egg whites and the remaining 1/4 cup sugar in a heat proof bowl set over (not in) a pan of simmering water, until the sugar has dissolved and the mixture is hot to the touch. With an electric mixer, beat on medium speed until foamy. Add the cream of tartar and beat on high speed until medium glossy peaks form. Spoon on top of the pies and use a kitchen torch to lightly brown the meringue. If you don't have a torch, just put the pies under oven broiler for 30 seconds.

Wednesday, August 24, 2011

recipe wednesday: grandma's triple decker brownies

 A delicious treat from Anne this week. 

 My Grandma used to make these brownies every weekend for my family.  We would always visit her on Sunday after church. On the way to her house we would stop by this local homemade ice cream shop called Charlaps and pick up a gallon of ice cream.  The combo of the triple decker brownie with ice cream is awesome.  I recommend a vanilla bean ice cream because the dessert is already very rich.  This dessert is a chocolate lover's dream!  The layers consist of a base of brownie, middle of marshmallow, and top of chocolate covered rice krispies and peanut butter.  Grandma knew the key to all our hearts, a big bear hug and dessert!  So if you have any loved ones that are stopping by this weekend, don't hesitate to whip up some of Grandma's brownies and give them each a bear hug too!

Grandma's Triple Decker Brownies

Box of Brownie Mix and ingredients that are required
1 tbsp butter
1 Bag (11.5 oz) of small marshmallows
1 Bag (12 oz) of semi-sweet chocolate chips
3 cups rice krispies

1) Follow directions on box for brownies in a 8 x 11 pan.  Let brownies cool.
2) Over stove top in medium size pan melt 1 tbsp butter.
Add in marshmallows and stir continuosly until completely melted.
Pour over brownies and spread out evenly.  Let marshmallow cool.
3) In double boiler melt chocolate chips, stir in rice krispies
pour mixture over marshmallows and spread out evenly. 
Let chocolate cool and cover with plastic wrap. 
4) Place in fridge for an hour to firm the top.
5) Serve with ice cream!

help!

I am looking for someone who can design a WordPress layout. I know you aren't supposed to mention that name on Blogger, but ah well. If you are the person, send me your rates/site/whatev to bluebutterflyvintage [at] yahoo {dot} com.

Also, let me know if you are down for bartering some vintage items for your design skills.

Tuesday, August 23, 2011

customer appreciation time: adorable mini style

Sorry for the lack of posts this week, as BBV is going through some changes. Not THE Change, but more like an adolescence of blogging in which the blog is changing formats. You know, so the blog brings someone home for dinner and the blog's mom is all 'he's no good for you' and then blog is all 'you never like anyone I bring home' and slams her bedroom door. That kind of change. That is news for later however, as right now I have the MOST adorable customer appreciation photo in the history of such photos. 

Check out Howl (amazing name) in his little Levi's jacket:


Are you still breathing, because I pretty much died of cuteness overload. AMAZING.

Saturday, August 20, 2011

straight talk

This is a Sponsored post written by me on behalf of Straight Talk for SocialSpark. All opinions are 100% mine.

Let's talk about the plans over at Straight Talk for a minute. You can get everything you need from a cell phone service wihtout a contract. And all at a great price. What would you do with that extra money? Maybe you could call a friend and meet them out for some dinner or take the money and buy some new shoes. Everyone loves new shoes. There are no contracts, no surprise bills and no credit checks. Great nationwide coverage and excellent reception/connectivity. Also, Straight Talk only uses trusted phone manufacturers like LG, Motorola, Kyocera, Nokia and Samsung.

There are numerous plans to choose from but I like the All You Need Plan. The “All You Need Plan” meets even the needs of heavy phone users with 1,000 minutes, 1,000 texts and 30 MB of web data. Unlimited Monthly service is only $45, and includes calls, text, picture messaging, and web. That is an amazing deal that even your mother would approve of and let's face it, mom knows best. She would also love the fact that 411 calls are included at no extra charge.

As far as phone selection goes, reconditioned phones are available from $10.00 with camera, mp3 player, mobile web access, and blue-tooth capability. These would be great for young users. They also have amazing smart phones; touch screen phones, and app capable phones with features like voice navigation, camera, video recorder, music player, instant messaging, and Bluetooth® to choose from.

Don't just take my word for it. Check out this testimonial:

<iframe width="480" height="390" src="http://www.youtube.com/embed/jaIMrd83feQ" frameborder="0" allowfullscreen></iframe>


Visit Sponsor's Site

Thursday, August 18, 2011

(unintentionally) funny movie posters

I enjoy perusing Netflix choices obviously to see what movies I want to rent, but for another much more hilarious purpose: unintentionally funny movie posters. I love the site Instant Watcher, which updates what new flicks you can watch via Instant (duh). Today they only had one new flick showing, a gem (I can only assume) of a flick called Elle: A Modern Cinderella Tale. The synopsis is something about a teen romantic comedy, but look at this hilarious (I would guess, unintentionally) movie poster:


The tag line "Happily ever after is just a song away" is not enough to make this hilarious, but the fact that the gal (again, haven't seen it, but by reading the plot summary) who is supposed to be a teen, looks like a Real Housewives of (fill in the blank) cast member. I am sure she is perfectly lovely and young in real life, so what's with the wind tunnel hair and botox-esque airbrushing that obvs took place? I was all 'ew, why is that teenage boy pining under aviators for someone who could be his mom and also, where is his neck?' With the exception of the little (ultra photoshopped) portion, does it not look like he is a turtle? Oh, movie posters, you slay me.

Wednesday, August 17, 2011

recipe wednesday: double stuffed french toast

Annie is back with something sweet this week:)

Double Stuffed French Toast


The first time I had stuffed french toast I was on my honeymoon in Stowe, Vermont.  We stayed at a B&B right outside of town that was amazing.  Our first breakfast there was stuffed french toast with real Vermont maple syrup.  The combination melted in your mouth and we were hooked.  Now almost every Sunday we make stuffed french toast.  Its addicting and you want to make it for your friends and family.  We even make it for dinner sometimes.  It reminds me of peanut butter and jelly, a staple in my childhood and something I ate almost everyday because it tasted so good.  I think something that makes this even more special is if you have homemade jam or jelly and real maple syrup.  So if your looking for a homemade meal that will put a smile on your face I suggest Double Stuffed French Toast!
 
This makes one serving
 
Ingredients:
 
Three slices of cinnamon swirl bread
2 eggs
1 tbspn butter
4 tbspn cream cheese
2 tbspn jam or jelly (any flavor, I love useing homemade raspberry jam)
1 tbspn powder sugar
Some fresh fruit to garnish with
2 tbspn maple syrup heated up


Turn oven on to 400 degrees.
Melt butter in large frying pan on medium heat over stovetop.
Scramble two eggs in bowl till it looks the same throughout (this is key for the egg to stick to the bread).
 
Dip slice of bread on each side to completely cover it. 
Drop bread onto frying pan.  Dip other slices of bread and drop onto frying pan.
When the bottom side is dark golden brown flip bread.
When both sides are dark golden brown remove from heat onto plate.
 
Put 2 tbspn cream cheese and 1 tbspn jam/jelly onto slice of bread then top with another slice. 
Cover second slice with cream cheese and jam/jelly and put third slice on top.
Transfer the french toast to a cookie sheet and place in oven at 400 degrees for 5 to 10 minutes.
Remove from oven, place on plate, sprinkle on powder sugar and fresh fruit.
Heat up maple syrup in glass bowl in microwave and pour over french toast.
Enjoy!


Monday, August 15, 2011

movie mondays: one day

Am I the only one who needs to see this movie, like yesterday?


It isn't out yet, but man I want need to see it.

Sunday, August 14, 2011

is that even relevant?


So, I had decided not to chime in on the blog about the relevancy default over at Etsy, but alas, something thing happened yesterday that has forced my opinions to be shared in public manner. Before we get into it, I am pro-relevancy. Etsy may not have the best formula for deciding which items are relevant just yet, but I think in the long run it will be an excellent change on the site. Ok, opinion is out there, now moving on...

My pal Lauren wrote a blog post about people whining over the relevancy change and how it was too early to be so negative with comments that are littering up Twitter feeds, probably still as we speak. In it she quoted one of my tweets that points out that August is one of the slowest sales months in online venues and to stop blaming relevancy for your lack of sales.

I guess you are not allowed to have an opinion as such, which is funny, because my tweet was less of an opinion and more of an actual fact, but hey, someone took offense to the comment. They proceeded to write a comment on the blog post in anonymous fashion (isn't that how the very mature handle things?) and went on to say how ridiculous Lauren was to quote someone who FLAGRANTLY tag stuffs. Anonymous Angel (my new pet name for Anonymous) then went on to say EVERYONE knows what tag stuffing is and ended their comment with "I've had fun reporting all of her listings for the last half hour. YIPEE! Relevancy is a bitch" Haha. Wtf? That person must live a pretty exciting life to take so much joy in wasting a half hour of her life reporting my items to Etsy.

Now, let me sidetrack here. Up until this past week, I didn't know tag stuffing was even thing. I thought it meant when someone lists something, say a rustic pair of 1960s boots and then tags them as modern, 1980s, and a whole bunch of other things that do not match the item. I used to have simple tags, then asked a friend of mine how she sold so much. She told me to beef up my tags and she was not doing it to break the rules, she clearly had no idea they existed. So, in fact, Anonymous Angel, not everyone is aware of tagging rules. I really don't see why we can't tag an item whatever we want in the space provided (as long as it pertains to the item), especially considering we are cut off at 13 tags and each has a limited number of characters, but that's a fight for another day. 

I am sure Anonymous Angel would not believe that, but it is true. I am never one to read the rules of Etsy and I NEVER go into the forums, because of 90% of the comments in them. Watching people attack Truche a few months back or the Hobo Wedding last month is more than enough reason to stay out of the vitriolic tunnels known as Forums. 

And, fyi, I am not the only one who didn't know what tag stuffing was, as when I mentioned the whole situation on Twitter, other friends who have been on Etsy even longer than I have didn't know about it. I must be a pretty flagrant jerk then, right?

That being said, I did learn about it the other day and up until my Anonymous Angel left her message, I had been changing a few per day. Well, she really helped me prioritize and now I have about 10 pages done out of 20, which is a much faster pace than I had been working at. So, thanks again, Anonymous Angel, for giving my motivation a needed boost. You're a real doll. And a class act to take so much joy in reporting a stranger's items to Etsy. Yipee! Relevancy just makes sense.

And I think that is pretty relevant.


Wednesday, August 10, 2011

recipe wednesday: peanut butter cup cupcakes with cognac ganache filling

Danielle is back with some amazing looking cupcakes this week!

These cupcakes are a ridiculous indulgence and are every bit as heavenly as they look! A chocolate cupcake filled with a gooey chocolate and cognac ganache, topped with peanut butter buttercream icing and peanut butter cups... it doesn't get any better. There are two secrets to the chocolate cupcakes... one is that the batter is mixed by hand and not with a mixer, and the second is that it has melted baker's chocolate combined with the standard cocoa powder to make it extra yummy.


For the Cupcakes:
2/3 cups all purpose flour
2 1/2 tbsp unsweetened cocoa powder
3/4 tsp baking powder
1/4 tsp salt
3 oz. semi sweet Baker's chocolate, chopped
11 tbsp unsalted butter, cut into pieces
3/4 cup plus 2 tbsp sugar
3 eggs, at room temperature
1 tsp pure vanilla extract


For the Ganache:
4 oz semi sweet Baker's chocolate, chopped
1/3 cup heavy cream
1 tbsp unsalted butter, room temperature
2 tsp cognac (you can certainly leave this out if you don't want to include alcohol)


For the Icing:
1/3 cup solid vegetable shortening (crisco)
1/3 cup unsalted butter
3/4 cup creamy peanut butter
1 tsp pure vanilla extract
4 cups sifted confectioners sugar
4-6 tbsp milk

Assorted decorations: peanut butter cups, mini cups, chocolate chips, etc.

To bake the cupcakes, preheat oven to 350 degrees and line a standard muffin pan with 12 paper or foil liners. In a small bowl, whisk together the flour, cocoa, baking powder and salt. Place the chocolate and butter in a large heatproof bowl and set it over but not touching simmering water in a small saucepan. Stir frequently until completely melted and smooth, about 5 minutes. Remove the bowl from the saucepan and allow the mixture to cool to room temperature. Stir the sugar into the chocolate mixture using a spatula until combined. Stir in the eggs, one at a time, and beat after each addition until combined. Add in vanilla and gently fold in the flour mixture just until no traces of flour remain. It's very important you follow these steps exactly and DO NOT over mix or these cupcakes will turn out very dry and crumbly.

Divide batter evenly among the liners, filling about 3/4 the way full. Bake until a toothpick inserted in the middle comes out with only a few moist crumbs attached, about 22-24 minutes. Cool in pan on rack for 5 minutes then take cupcakes out and let cool completely for an hour.

Using a paring knife, cut a small round hole in the middle of the cupcake, and pull out the "cylinder" of cupcake. Trim that cylinder to about a half inch... this will be used to "cork" the cupcakes back up once we fill them. Use your finger to press down lightly inside the hole in the cupcake to make a cavity to fill with the ganache.

To make the ganache filling, place the chocolate in a small heatproof bowl and set aside. Heat the cream in a small saucepan until simmering (don't let it boil). Pour over the chocolate, let it sit for about a minute and then stir until smooth. Add in the vanilla and cognac (is using) and stir until smooth. Wait a few minutes for the ganache to start to cool and set up before filling the cupcakes. Spoon the ganache into the cupcakes and then top with the cupcake "corks".

Make the frosting by creaming the shortening and butter in an electric mixer . Add peanut butter and vanilla. Gradually add the confectioner's sugar, one cup at a time at low speed. When all the sugar is incorporated, the icing will appear very dry. Add the milk, one tablespoon at a time until the frosting reaches the right consistency and is light and fluffy. Everyone ices cupcakes differently... but I use a piping bag and a 2C wilton tip. I usually alternate decorating half the cupcakes with regular sized peanut butter cups that have been cut in half (freeze them before cutting them to get clean cuts), and the other half are decorated with mini cups and mini chocolate chips. 


Once cupcakes are finished, store them in an airtight container in the refrigerator to allow the ganache filling to set up fully. Let come up to room temperature for about a half hour before eating. The ganache inside will be gooey but not runny.